Many of us use Swagger and Swashbuckle on ASP.NET Core to have some
minimal documentation for our API.
It's really easy to integrate with your API and gives a good overview of
the available endpoints in the API.
But you might find that the Swagger UI doesn't fit your colour scheme, and/or you want to replace the Swagger branding with your own. Thankfully the steps to change that are rather simple.
Below are my changes to make the UI more fitting for my API.
The default Swagger UI page is under
myapp.com/swagger/index.html. But you can change the
/swagger/ part.
I, for example, changed my route to /docs/.
This can be done with a few simple changes in the
Startup file:
public void Configure(...)
{
    ...
    app.UseSwagger(options =>
    {
        options.RouteTemplate = "docs/{documentName}/docs.json";
    });

    app.UseSwaggerUI(options =>
    {
        options.SwaggerEndpoint("/docs/v1/docs.json", "My API V1");

        options.RoutePrefix = "docs";
    });
}
The Swagger logo can be seen both in the favicon and in the top bar, on the top left corner of the site.
To change the favicon, the first step is to make sure you have your favicon. RealFaviconGenerator is a great favicon generator if you need one.
Once you have your favicon, you need the create the directory
wwwroot/docs where the docs part is from the
Route Change above. So if you haven't changed
your route, the directory will be wwwroot/swagger.
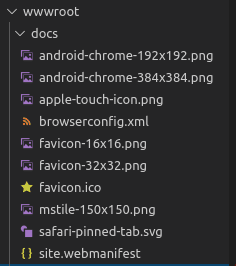
You then copy-paste your favicon into that folder. Make sure the files
favicon.ico, favicon-16x16.png, and
favicon-32x32.png are included.
So, you should see something like this:
Also, make sure that the application uses static files configuration:
public void Configure(...)
{
    ...
    app.UseStaticFiles();
    ...
}
You might need to press Ctrl + F5 for cache refresh for the
favicon change to appear.
Replacing the logo at the top bar means we need to do a little bit of CSS magic.
A custom CSS file is needed under
wwwroot/swagger-ui/custom.css.
In that CSS file, I added the following:
.topbar-wrapper img[alt="Swagger UI"], .topbar-wrapper span {
    visibility: hidden;
}

.topbar-wrapper .link:after {
    content: 'Unoffical McLaren F1 API';
    color: #fff;
    visibility: visible;
    display: block;
    position: absolute;
    padding: 15px;
}
This replaced the logo with text, but you should be able to replace it with your own logo.
Once that is ready, the following code needs to be added to include the custom CSS changes.
public void Configure(...)
{
    ...
    app.UseStaticFiles();
    ...
    app.UseSwaggerUI(options =>
    {
        ...
        options.InjectStylesheet("/swagger-ui/custom.css");
        ...
    });
}
This part builds on the last one. I wanted to replace the default Swagger green colour with something else. In my case, I replaced it with a red colour.
So here I added to the custom CSS file created earlier.
    .swagger-ui .topbar .download-url-wrapper .select-label select {
        border-color: #EF1C25;
    }

    .swagger-ui .info .title small:last-child {
        background-color: #EF1C25 !important;
    }
It's also possible to inject a custom JavaScript, in the same way as the CSS.
public void Configure(...)
{
    ...

    app.UseSwaggerUI(options =>
    {
        ...
        options.InjectJavascript("/swagger-ui/custom.js");
        ...
    });
}
So with the custom CSS and JavaScript, you can really customize the UI to your liking.
You can see the source code here.
Hopefully, this helped. Have a great day.
Thank you for reading.